Bathroom Wall Art Prints for Small Bathrooms, Ensuites, & Half Bathrooms
By Anne N.May 23, 2026 | 10:00 AM AEST (Featured image: Icy Leaves framed botanical bathroom wall art print beside a white vanity, brushed…

By Anne N.
October 5, 2025 | 11:48 PM AEST
(Featured image: Zakynthos, Greece, Clear Sharp Image of Blue Sea. Photo by Pixabay via Pexels)
Blurry photos are every photographer’s frustration. Even with an expensive DSLR or mirrorless camera, soft images can sneak in because of motion, focus errors, or lens settings.
This guide breaks down exactly how to get sharper photos step by step whether you shoot landscapes, portraits, or wildlife.

(Featured image: A Close Up Photo Of A Green Parrot Sitting On A Branch. Photo by Roshan Kamath via Pexels)
A slow shutter lets in light but also records movement.
For handheld shots, use the reciprocal rule: keep shutter speed faster than your focal length.
For example:
When in doubt, double it. Faster is better for sharpness.
Camera shake causes blur, especially in low light.
Options that work:

(Featured image: Yellow Bumblebee Gathering Pollen Close-up Photography. Photo by Kat Smith via Pexels)
Modern cameras offer advanced autofocus, but they’re only as smart as your settings.
Every lens has a “sweet spot” two or three stops down from its widest aperture.
If your lens opens to f/2.8, try f/5.6–f/8 for maximum edge-to-edge sharpness.
Avoid extremes (f/1.4 or f/22) unless needed for creative effect.

(Featured image: A View of the Tathra Wharf in Australia. Photo by Matilda Iglesias via Pexels)
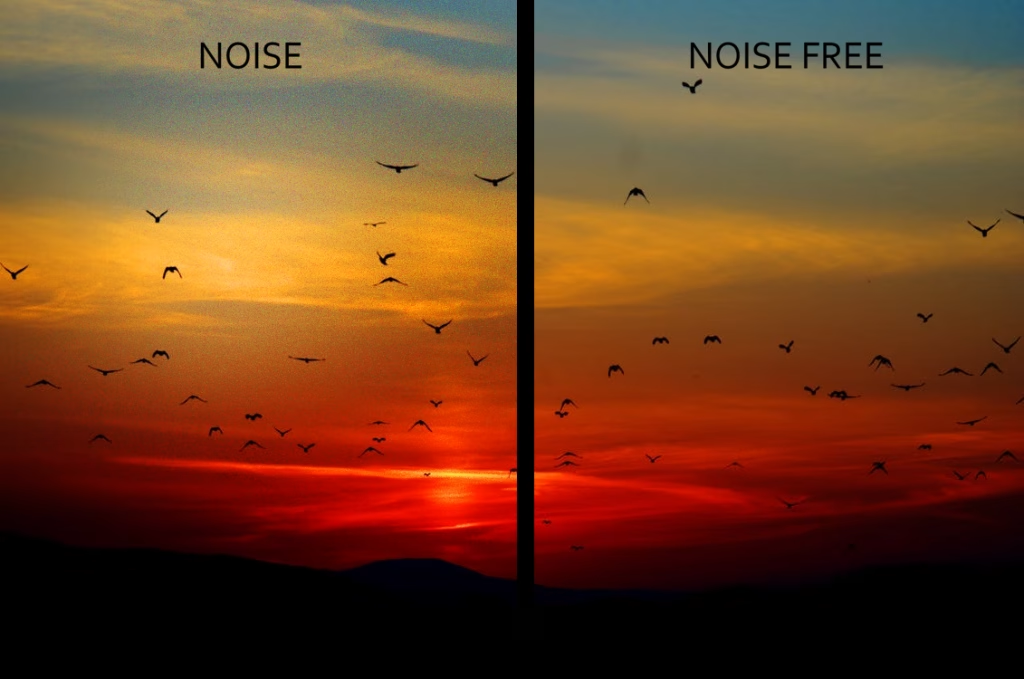
High ISO increases noise, which softens detail.
Whenever possible, use ISO 100–400 in daylight.
If light is low, stabilise the camera instead of boosting ISO too high.
(Featured image: Flock of Birds Flying Above the Mountain during Sunset. Photo by Pixabay via Pexels)
Smudges and dust scatter light and reduce clarity.
Keep elbows tucked, feet shoulder-width apart, and brace against your body or wall.
Exhale gently before pressing the shutter to reduce shake — just like a marksman.

(Featured image: Scenic View of Landscape Against Sky. Photo by Pixabay via Pexels)
Soft early-morning or late-afternoon light enhances edge contrast.
Harsh midday sun creates haze and overexposure that make photos appear less sharp.
If indoors, use window light or an off-camera flash bounced from the ceiling.
Even perfectly focused images benefit from subtle sharpening in editing.
In Lightroom or Photoshop:
| Problem | Likely Cause | Quick Fix |
|---|---|---|
| Blurry overall | Shutter too slow | Increase speed / stabilise |
| Focus off | AF on wrong subject | Use single-point AF |
| Edge softness | Lens at widest aperture | Stop down to f/5.6–f/8 |
| Hazy detail | Dirty lens / filter | Clean surfaces |
| Motion blur | Hand movement | Tripod or faster shutter |
Not all lenses are equal. Prime lenses (fixed focal length) often produce sharper results than budget zooms.
If you’re serious about crisp detail, invest in one good prime — like a 35 mm f/1.8 or 50 mm f/1.4 — and learn its strengths.
Sharpness isn’t about buying the most expensive camera. It’s about technique, light, and discipline. Once you master those, your photos will look cleaner and more professional, no matter what gear you use.
For photographers who print their images, explore Van Vakarnee’s fine-art print services to see your sharpest work turned into museum-quality wall art.

(Featured image: Photo of Coconut Trees On Seashore In Maldives. Photo by Asad Photo Maldives via Pexels)