Bathroom Wall Art Prints for Small Bathrooms, Ensuites, & Half Bathrooms
By Anne N.May 23, 2026 | 10:00 AM AEST (Featured image: Icy Leaves framed botanical bathroom wall art print beside a white vanity, brushed…
By Anne N.
January 2, 2026 | 12:17 PM AEST
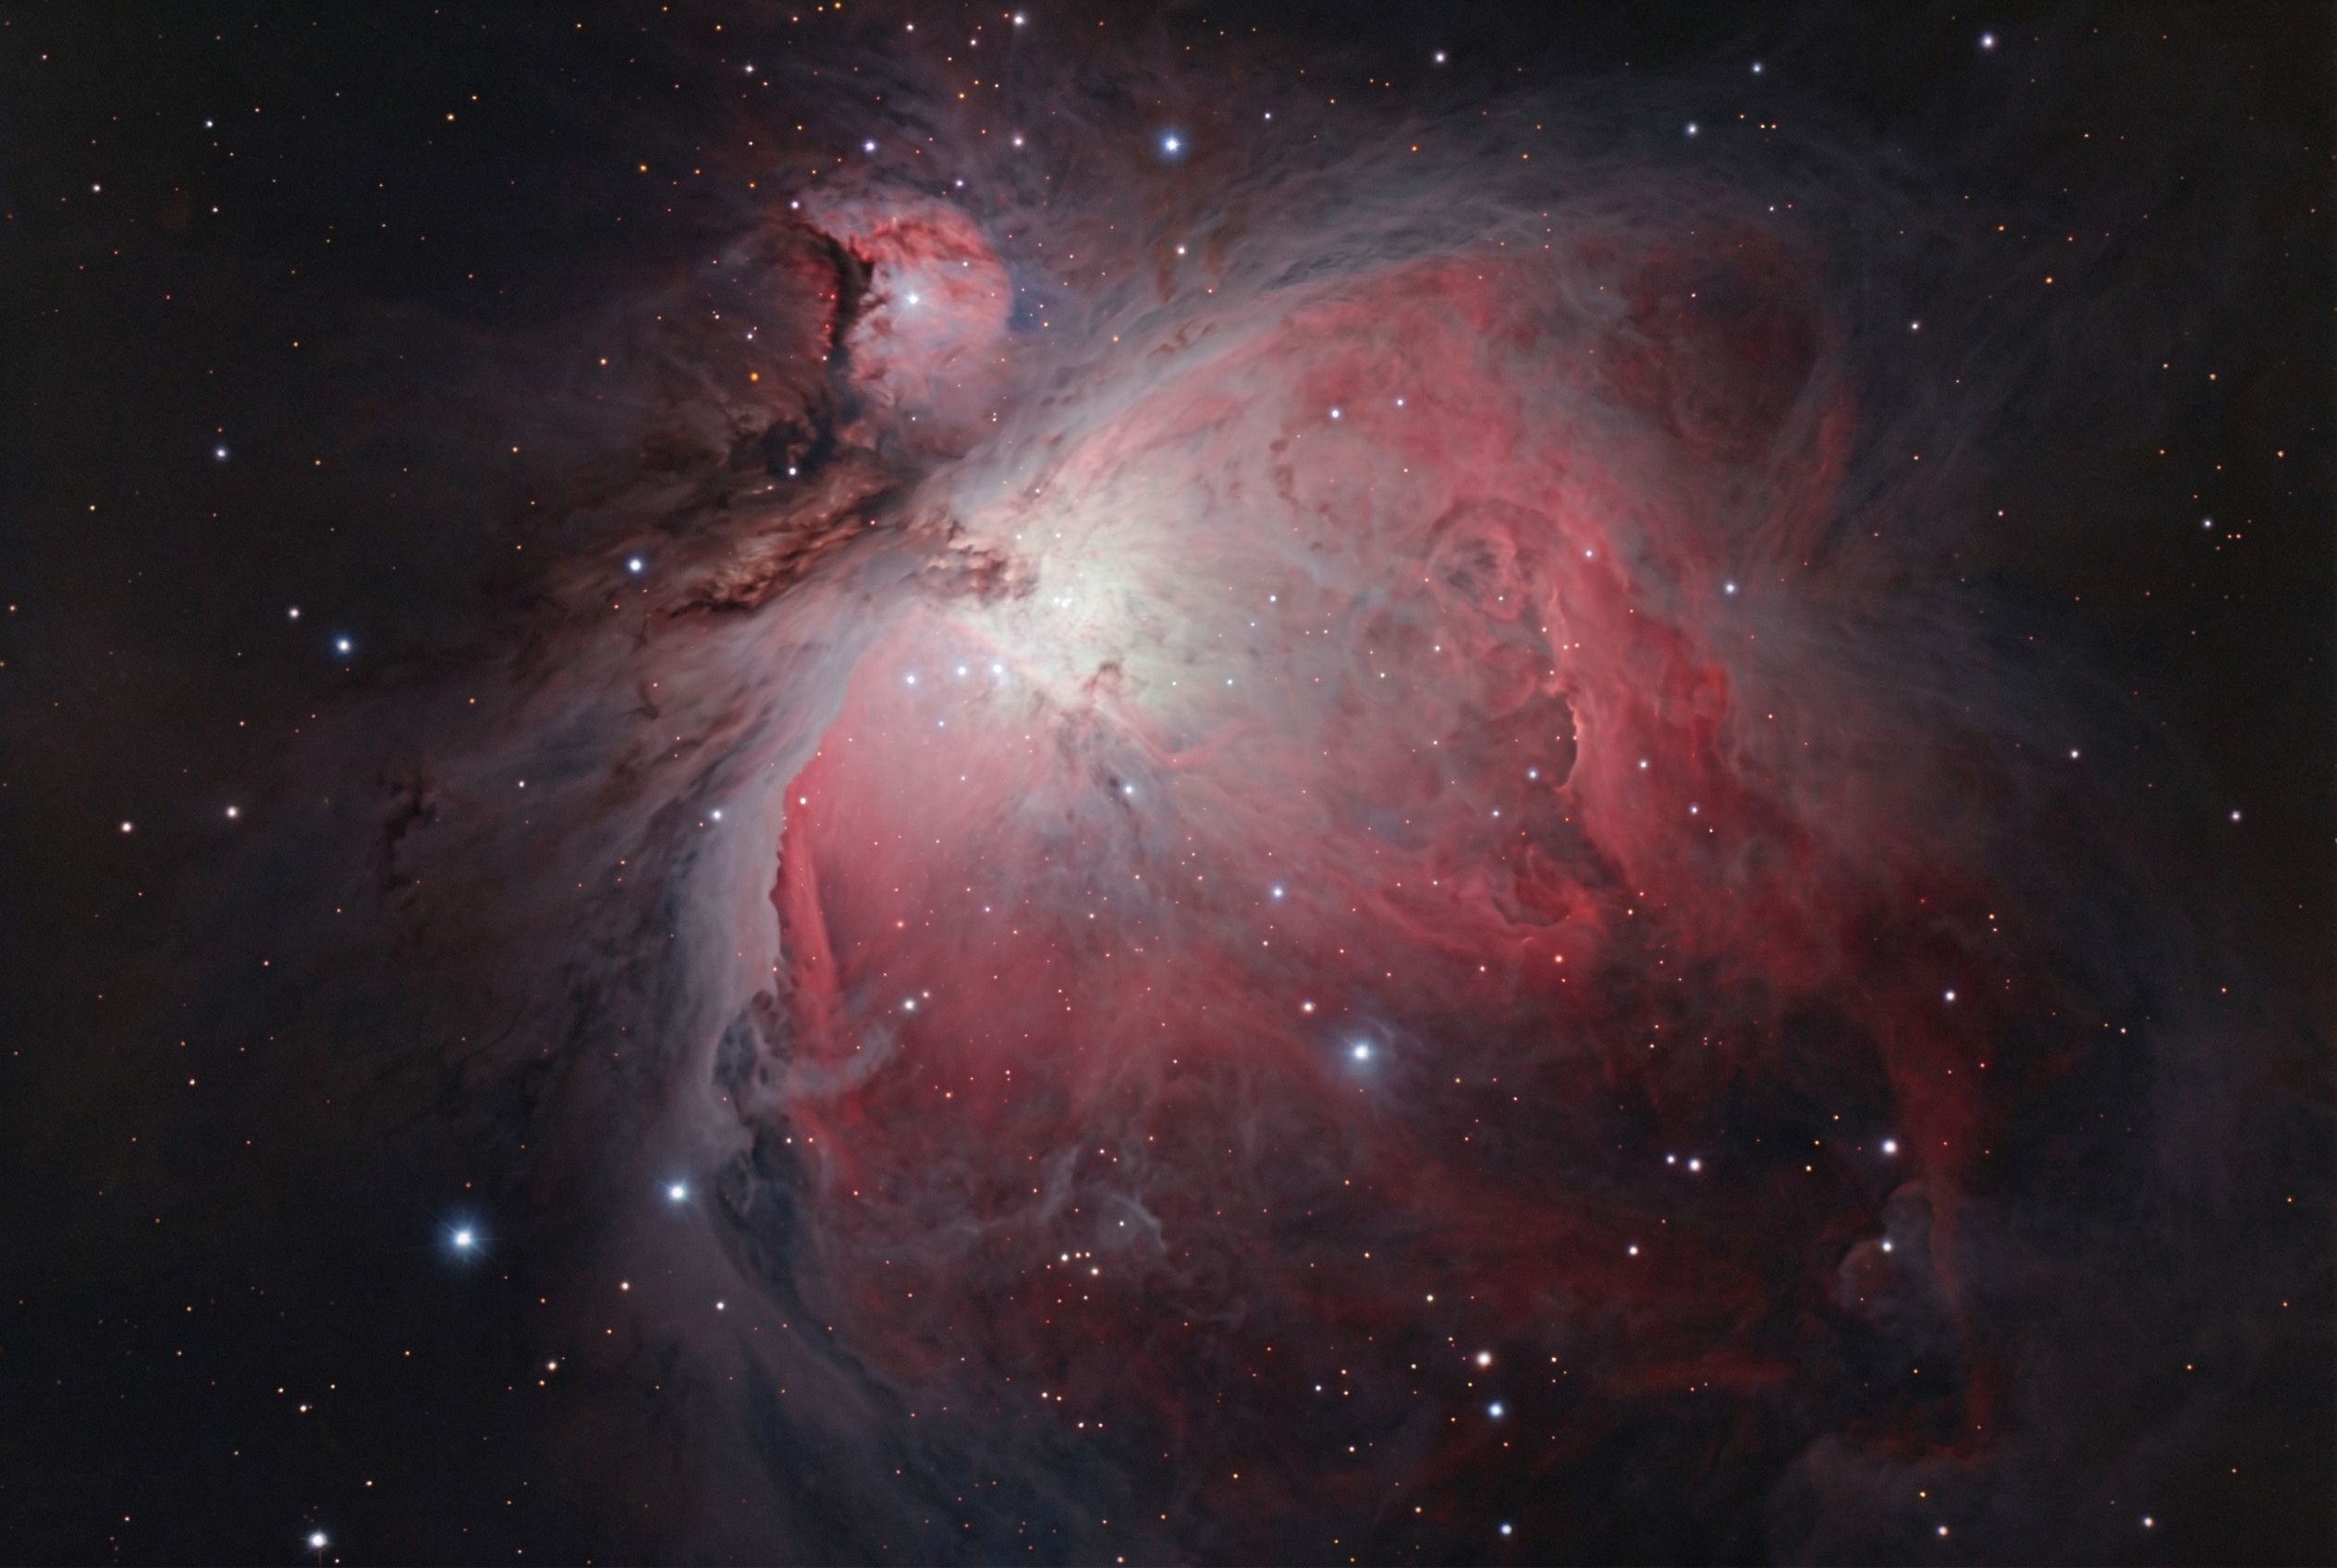
(Featured image: Orion Nebula. Photo by VanVakarnee)
For many photographers, deep-sky astrophotography feels out of reach. There is a common misconception that capturing colorful nebulas requires a telescope, a complex equatorial mount, and thousands of dollars in specialized equipment.
The truth is, you likely already own everything you need to capture the Orion Nebula, the Horsehead Nebula, and the Flame Nebula.
By using a technique called “untracked astrophotography,” you can bypass the need for a star tracker. This guide will walk you through the gear, the settings, and the specific workflow required to capture deep-space objects using just a standard DSLR and a tripod.
1. Essential Gear for Untracked Astrophotography
You do not need a telescope to shoot deep space. In fact, for beginners, a standard camera lens is often easier to manage. Here is the basic toolkit:
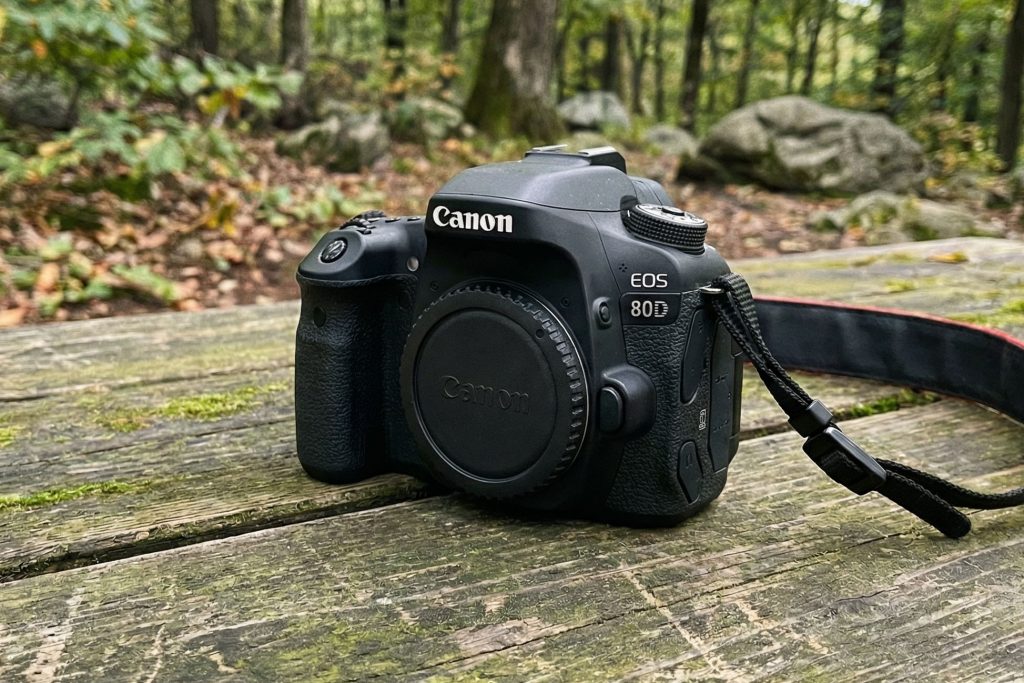
(Featured image: Body only canon 80d. Photo by VanVakarnee)
2. The Science: The NPF Rule vs. The Rule of 500
The biggest challenge in untracked astrophotography is the rotation of the Earth. If your shutter speed is too long, the stars will turn into streaks rather than sharp points.
Old-school photography guides suggest the “Rule of 500” (500 divided by your focal length). However, with modern high-resolution sensors, this rule often results in blurry stars.
Use the NPF Rule
For sharp stars, use the NPF Rule. This is a more complex calculation that accounts for your camera’s pixel pitch and aperture. You don’t need to do the math yourself; simply download an app like PhotoPills or use an online NPF calculator.
3. Best Camera Settings for Deep Sky
Before you head out to a dark sky location, configure your camera settings. Shooting deep sky is different from standard night photography.
4. The Secret to Clarity: Calibration Frames
To get a professional-looking image, you cannot rely on “Light frames” (photos of the stars) alone. You need to take Calibration frames to clean up the image during post-processing.
5. Shooting Workflow in the Field
Step 1: Finding and Focusing
Locate the constellation Orion. It is one of the easiest to find because of the three bright stars that make up “Orion’s Belt.” The nebula is located in the “sword” hanging just below the belt.
To focus, switch to Live View and find a bright star (like Rigel). Zoom in digitally on your screen (10x) and manually adjust the focus ring until the star is a tiny, sharp point. If you have a Bahtinov Mask, adjust focus until the central diffraction spike sits perfectly in the middle of the “X”.
Step 2: The Drift Method
Because you don’t have a tracker, Orion will move across your frame.
Aim for at least 30 to 60 minutes of total integration time. The more photos you take, the less noise your final image will have.
6. Post-Processing: Stacking and Editing
Once you have hundreds of files, you need to combine them.
Deep Sky Stacker (DSS)
Use free software like Deep Sky Stacker to align and combine your Light, Dark, Flat, and Bias frames. The software analyzes the stars, rotates the images to match, and stacks them into a single, high-quality TIFF file. This process drastically increases the “Signal-to-Noise Ratio” (SNR).
Stretching in Photoshop
The file that comes out of DSS will look very dark—almost black. This is normal. You must “stretch” the data in Photoshop:
Summary
You don’t need to break the bank to explore the universe. With a DSLR, a standard portrait lens, and a bit of patience in post-processing, you can capture the stunning colors of the Orion Molecular Cloud Complex from your own backyard.

(Featured image: Orion Nebula composite image. Photo by Hubble Space Telescope via NASA)